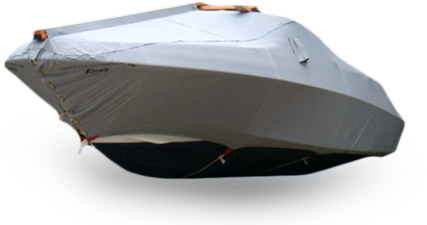
Before Installation
Step 1
You will need approximately 100' of rope per every 20' of boat.
Step 2
Be sure to have padding material on hand to soften sharp/ rough edges on the boat (carpet scraps, heavy cardboard, etc.)
Step 3
If your cover does not have support pockets, then you will need to construct a support frame for your cover. The suggest material is either wood or PCV pipe.
Installation
Step 1
DO NOT UNROLL THE COVER ON THE GROUND!
Step 2
Cushion all sharp areas with padding (antennae brackets, outriggers, etc.)
Step 3
Roll out the cover on top of the boat per instructions stenciled on the cover. When you receive the cover from our warehouse, the instructions will be visible on the outside of the cover. When rolled out, the
instruction stencil will be located on the inside, center of the cover. (Reinforcement bands are on the inside of the cover as well).
Step 4
Tie rope from one loop to another, do not lace. Make sure each set of ropes are snug but not pulled tight.
Step 5
Pull draw rope tight and tie off at the front. (draw rope is sewn into the hem of the cover along the water line).
Step 6
Lace up the front of the cover, making sure the flap is single against the hull.
Removal
Step 1
Cover must be dry and free of moisture (this allows for the cover to have a long life)
Step 2
Remove 2”x 4” supports (if you have them) and untie ropes from one side of the cover, leaving the other end of ropes tied.
Step 3
Work cover up one side of the boat and over the top. When you have the cover to one side, drop the cover to the ground. Be sure the cover drops free of the boat and does not snag any sharp corners.
Step 4
Roll cover up so that the stencil on the side is showing (you will know where to start next year)
Storage
Step 1
Store cover in a dry, moisture- free area. Do not leave the cover on the ground or on a concrete
pad, this will cause the cover to rot.
Step 2
The best place to store the cover is in the rafter of a garage. If this is not possible, you can store
the cover on a pallet or in a plastic tote with a tight fitting lid.
Step 3
If the cover needs to be repaired, you should have this done as soon as possible, please do not wait until last minute. Any canvas shop should be equipped to repair your cover or it can be
returned to our facility for genuine FISHER service.
Step 4
Do not leave your cover outdoors for an extended period while it is off the boat.
Miscellaneous Tips
Tip 1
The Cover must be exposed to sunlight to allow for proper drying
Keeping the boat covered under trees is NOT recommended
Tip 2
Center Consoles (without hard/ “T” tops)- We recommend putting a upside down “U” brace or “T” shaped
brace around the console for the 2x4’s to rest on (customer can use their judgment as to
what material to use).
Tip 3
Boats with a walkthrough windshield, the front 2x4 should rest on a “spreader board” which is situated horizontally on top of the back 2x4’s (picture can be seen in gallery).
Tip 4
Do not use the draw rope to lace up the grommets in the bow, a separate piece of ¼”
rope is needed. The draw rope is for added security and should tie off in the front
Tip 5
When inserting the 2x4’s into the pockets, insert them carefully standing on end to allow
for the cover to be more taught.
Tip 6
Place a piece of wood between the two 2x4s to keep them parallel to each other. This
piece of wood can be 1”x 1” and a nail can be used to secure it to the 2x4s through the
grommet. The purpose is to keep the boards separated should there be a buildup of
snow/rain.
